How to Set Up Cyberduck for Mac
1.Download Cyberduck SFTP client for Mac from http://cyberduck.ch/
2.Click the Open Connection icon.
3.Select FTP-SSL (Explicit AUTH TLS) from the Protocol drop-down menu.
4.Enter 21 in the Port field.
5.Enter your server.GeekHost.ca in the Server field.
6.Enter your username in the Username field.
7.Enter your password in the Password field.
8.Check the Add to Keychain checkbox, if that option appears.
9.If you wish to login directly to your HTML files folder, enter /WWW in the Path field. If you leave the Path field blank you will login into your Home directory. 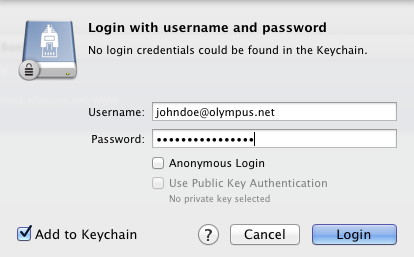
10.Click the Connect button to connect to the server.
11.If you receive a Verify Certificate failure, click continue, then click to trust the certificate issued to userservices.net.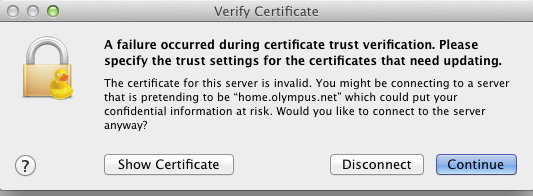
12.Once you trust the certificate you will be prompted to authenticate using your username and password. Be sure to check the checkbox Add to Keychain, and click Login
